Last updated: August 22, 2026 | Data verified against official issuer terms
Listing photos are the single biggest factor in whether a buyer clicks into your home or scrolls past it. With the vast majority of buyers starting their search online — commonly cited figures put it at 96–99% — your photos are effectively your home’s first (and sometimes only) showing. Industry data consistently backs this up: homes marketed with professional photography have been shown to sell significantly faster than those without, and listings with strong images tend to attract dramatically more online views than comparably priced homes with weaker photos.
This guide covers everything that goes into a listing photo set that actually performs — from the gear worth using, to camera settings, staging, lighting, composition, exterior and drone shots, and the editing choices that make photos look polished without crossing into misleading. Whether you’re hiring a professional or shooting your own listing, these are the fundamentals that separate photos that generate showings from photos buyers scroll past.
Why Listing Photography Matters More Than Almost Anything Else in Your Marketing
Before diving into technique, it’s worth being clear about the stakes. A buyer scanning a real estate app doesn’t read your listing description first — they see the thumbnail photo. If it’s dark, cluttered, distorted, or simply unremarkable next to the ten other listings on the same page, they never get far enough to read a single word of your carefully written description.
The data on this is consistent across multiple industry sources:
- Homes marketed with professional photography have been reported to sell considerably faster than average, with some analyses citing a reduction in days on market of roughly a quarter or more.
- Listings with professional images have been shown to receive well over double the online views of listings with lower-quality photos.
- Buyer behavior research shows that the overwhelming majority of home searches now begin online, meaning photography functions less like an optional marketing add-on and more like the core sales infrastructure of the entire listing.
The upshot: even a modest investment in doing photography well — whether that’s hiring a professional or simply following a disciplined DIY process — tends to pay for itself many times over in faster sales and stronger buyer interest.
Hire a Professional, or Do It Yourself? How to Decide
Professional real estate photographers bring calibrated gear, lighting equipment, and editing workflows that are difficult to fully replicate with a smartphone and good intentions. For higher-priced listings especially, professional photography is close to a non-negotiable investment.
That said, high-end phone cameras combined with careful lighting and composition can produce solid results for more modest listings, particularly if you follow the same core principles a professional would use: shoot on cloudy or soft-light days, stage before you shoot, keep the camera level, and avoid extreme wide-angle distortion.
If you do hire a professional, prioritize someone with:
- A real estate–specific portfolio (not just general photography work)
- Clear communication about deliverables, turnaround time, and revision policy
- Experience with HDR interior photography and straight-line correction
- The ability to deliver files pre-sized and formatted for MLS and social media, so you’re not stuck resizing or reformatting later
The Essential Gear (If You’re Shooting It Yourself)
You don’t need the most expensive equipment on the market, but a few pieces of gear make an outsized difference in the quality of the final images.
Camera
A DSLR or mirrorless camera with full manual controls is the foundation of professional-looking listing photos. Full-frame sensors handle low light and dynamic range (the gap between bright windows and darker interiors) noticeably better than smartphone sensors or smaller crop-sensor cameras, though crop-sensor cameras remain a perfectly reasonable, more affordable starting point — the image-quality gap between modern APS-C and full-frame bodies has narrowed considerably in recent years.
Lens
This is arguably the single most important piece of gear in the kit. A wide-angle zoom lens is the industry standard for interiors — most professional real estate photographers work somewhere in the 16mm–35mm range on a full-frame camera (roughly 10mm–18mm on a crop-sensor body), which is wide enough to capture a full room in a single frame without the extreme distortion of an ultra-wide or fisheye lens.
A practical rule worth internalizing: go wide enough to explain the space, but not so wide that the photo feels misleading. Extremely wide focal lengths (12mm and under on full-frame) start visibly stretching furniture and doorways near the edges of the frame — a distortion buyers notice and associate with untrustworthy or amateur listings. Many experienced real estate photographers deliberately avoid anything wider than about 16mm on a full-frame body for exactly this reason, since a mismatch between wide-angle listing photos and the actual room size at a showing is one of the fastest ways to erode buyer trust.
A macro or standard mid-range lens is also useful for close-up detail shots — hardware finishes, tile work, custom built-ins — that a wide-angle lens can’t capture cleanly.
For high-end listings with architectural features worth showcasing precisely, a tilt-shift (perspective control) lens solves the classic “leaning walls” problem at the optical level rather than in editing, though these lenses represent a serious investment and are typically reserved for luxury or commercial work.
Tripod
A sturdy tripod is close to mandatory, not optional. It keeps images sharp during the longer exposures often needed for interior and twilight shots, ensures consistent, level framing from shot to shot, and is essential if you’re using HDR bracketing (shooting the same frame at multiple exposures to blend later), since the frames need to align precisely.
Lighting
A basic off-camera flash with a softbox can fill dark corners and even out contrast between bright windows and dim interior areas — something natural light alone often can’t solve, especially in rooms with limited window exposure.
Drone
Aerial photography has become a standard buyer expectation for many listings in 2026, particularly for larger properties, homes with notable lot size, waterfront properties, or homes where the surrounding neighborhood is a selling point. Compact, sub-250-gram drones have made this more accessible and don’t require the same registration overhead as larger models in many jurisdictions — though local drone regulations vary and should always be checked before flying over a property.
Camera Settings That Actually Matter
You don’t need to memorize every setting, but a few fundamentals consistently show up across professional workflows:
- Shoot in RAW, not JPEG. RAW files preserve far more detail in shadows and highlights, giving you real flexibility during editing that a compressed JPEG simply can’t recover.
- Keep ISO low (roughly 100–400) to minimize digital noise, especially important in the darker corners of interior shots.
- Use a narrow aperture (commonly f/7.1–f/11) to keep the entire room — foreground and background — in sharp focus, rather than a shallow depth of field that blurs part of the space.
- Bracket your exposures. Capturing the same frame at multiple exposure levels (for example, -1, 0, and +1 EV) gives you the raw material for HDR blending, which balances a bright window view against a dimmer interior without one or the other looking blown out or murky.
- Use a 2-second timer or remote shutter release to eliminate camera shake from pressing the shutter button by hand, particularly important at slower shutter speeds.
HDR: What It Is and Why It Matters (and Where It Goes Wrong)
High Dynamic Range (HDR) photography blends multiple bracketed exposures of the same frame into a single balanced image — recovering detail in bright windows and dark interior corners that a single exposure can’t capture simultaneously. Done well, HDR produces a natural-looking image where both the outdoor view and the room’s interior details are clearly visible.
Done poorly, HDR is one of the fastest ways to make a listing photo look artificial. Buyers have become increasingly sensitive to over-processed images — telltale signs include bowed or warped ceilings, unnaturally vivid or “painted-looking” skies, glowing halos around window frames, and colors that look oversaturated compared to reality. The goal of HDR is to replicate what the human eye naturally does when it adjusts to a room’s mixed lighting — not to create a hyper-realistic, video-game version of the space. If the finished photo looks noticeably different in tone and color from what a buyer will see walking through the door, the editing has gone too far.
Staging: Prepare the Home Before You Ever Pick Up the Camera
A home can feel perfectly tidy in person and still photograph badly. Small details that go unnoticed during everyday living become glaring distractions once they’re frozen in a still frame — visible cords, dish soap bottles, pet beds, refrigerator magnets, bathroom clutter, and half-empty shelves all pull a buyer’s eye away from the room itself.
A basic pre-shoot checklist that professional photographers routinely ask sellers to complete before arriving:
- Clear all countertops in kitchens and bathrooms down to one or two intentional decorative items.
- Depersonalize visible areas — remove family photos, personal paperwork, and highly specific decor that makes it harder for a buyer to picture themselves in the space.
- Hide cords, remotes, and everyday clutter that won’t register as a problem in person but will stand out in a still photo.
- Make all beds and straighten pillows and throws.
- Turn on all interior lights, even during a daytime shoot, to add warmth and eliminate dark corners.
- Open all blinds and curtains to maximize natural light, unless the view outside is genuinely unappealing.
- Remove pet bowls, litter boxes, and pet bedding from any room being photographed.
- Tuck away trash cans, floor mats, and cleaning supplies.
- Ask sellers and family members to leave the home during the shoot. It speeds up the process and results in more natural, uncluttered compositions.
If a home is vacant, sparsely furnished, or has awkwardly proportioned rooms, virtual staging — digitally adding furniture and decor to photos of an empty space — has become a widely used, cost-effective alternative to physical staging. Buyers generally respond better to a furnished-looking room than an empty one, since empty rooms are notoriously difficult to judge for scale.
Composition: How to Shoot Each Room
- Shoot from doorways or corners to capture the maximum usable width of a room in a single frame — this is especially useful for smaller rooms that need to read as spacious rather than cramped.
- Keep the camera level with the horizon. A tilted camera creates converging or “leaning” vertical lines (known as keystoning) in doorframes, cabinets, and windows — one of the most obvious giveaways of an amateur or rushed shot. Position the camera at roughly chest height (about 4–5 feet off the ground) for most interior shots, which tends to produce the most natural-feeling perspective.
- Prioritize straight verticals in-camera, rather than relying entirely on correcting them in editing afterward. Heavy post-production correction on severely tilted shots can introduce its own distortion.
- Follow a consistent shot list for every property so nothing gets missed: front exterior, back exterior, entryway, living room, kitchen, dining area, each bedroom, each bathroom, the primary suite, home office (if present), basement, garage, and any standout feature (pool, deck, view).
- Shoot a sequence, not just isolated rooms. A set of photos that shows how spaces connect to one another — the kitchen opening into the living room, for example — helps buyers understand the actual flow of the home, not just its individual parts.
- Check reflective surfaces before shooting. Mirrors, glass doors, stainless steel appliances, and picture frames can reveal the photographer, tripod, or flash equipment in the frame — an easy and common mistake to miss in the moment.
Lighting: Timing and Technique
Lighting is less about raw brightness and more about making a room feel warm, spacious, and trustworthy rather than harsh or flat.
- Overcast days are often better than bright sunshine for interior photography. Direct sun creates harsh shadows and blown-out highlights near windows, while soft, diffused light from an overcast sky produces more even, flattering interior lighting.
- Shoot interiors and exteriors separately if weather doesn’t cooperate. If it’s raining or the sky is unappealing on the day of the shoot, prioritize interiors and plan a separate exterior session, or replace the sky digitally during editing (a common, generally accepted practice, distinct from more misleading edits).
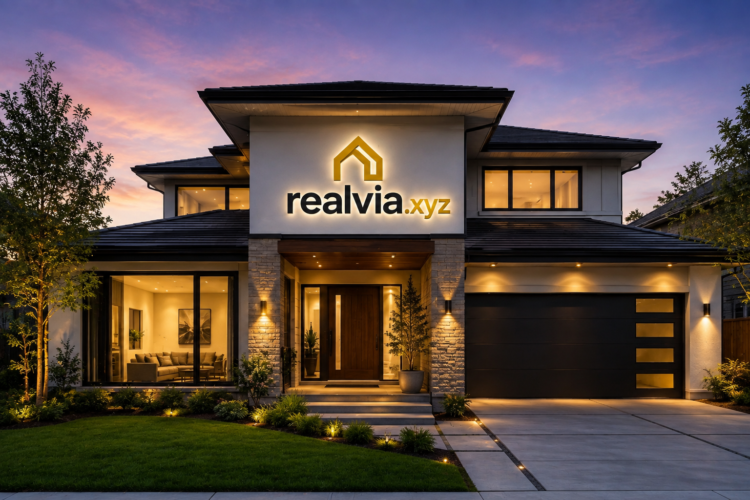
- Consider a twilight or evening shot for the exterior. A well-lit home photographed at dusk, with interior lights glowing warmly against a darkening sky, is one of the most consistently effective single images in a listing gallery — it signals warmth and lifestyle in a way daytime exteriors often can’t.
- Turn on every light in the home, even in daylight shots, to eliminate dark corners and add a subtle layer of warmth throughout the gallery.
Exterior and Drone Photography
The exterior shots are often the very first image a buyer sees, making curb appeal photography just as important as anything captured inside.
- Shoot the front exterior from multiple angles and at multiple times of day if possible, choosing the version with the most flattering light and the least distracting background (parked cars, trash cans, neighboring homes creeping into frame).
- Clean up the yard and entryway before shooting — coil hoses, put away toys and lawn equipment, and sweep walkways.
- Use a drone for aerial context where it adds real value: large lots, waterfront or view properties, homes with distinctive landscaping, or listings where the surrounding neighborhood (parks, water access, cul-de-sac layout) is part of the sales pitch. Aerial shots have become an increasingly common buyer expectation, particularly for larger or higher-priced properties.
- Always check local drone regulations before flying over a property or neighboring homes — rules vary by jurisdiction and airspace, and some areas require registration or specific flight restrictions near residential zones.
Editing: Refine, Don’t Alter
Post-production should sharpen and balance what’s genuinely there — it shouldn’t invent features the home doesn’t have. This distinction matters both ethically and practically: an over-edited photo that doesn’t match the in-person showing creates buyer disappointment, and disappointed buyers don’t make offers.
Reasonable, standard editing includes:
- Correcting converging vertical lines from wide-angle distortion
- Balancing exposure between bright windows and darker interiors (standard HDR blending)
- Adjusting white balance so interior lighting doesn’t look artificially yellow or blue
- Removing small, temporary distractions (a stray cord, a reflection of the photographer)
- Replacing an unappealing sky on an otherwise good exterior shot
Editing that crosses the line into misrepresentation includes:
- Digitally adding or removing structural features, furniture, or landscaping that doesn’t exist
- Stretching or expanding a room’s apparent dimensions beyond what an accurate wide-angle lens would capture
- Oversaturating colors or finishes to the point that the in-person material doesn’t match the photo
- Virtually staging a room without disclosing that the furniture shown is not physically present, where required by local MLS or disclosure rules
Several U.S. states have begun introducing or clarifying disclosure requirements specifically for AI-generated or AI-altered real estate images, reflecting growing buyer sensitivity to over-processed or misleading listing photos. Always check your local MLS rules and any applicable state disclosure requirements before publishing heavily edited or virtually staged images.
A Quick Pre-Shoot Checklist
Run through this before every listing shoot, whether you’re hiring a professional or shooting it yourself:
- Declutter and depersonalize every room that will be photographed.
- Confirm the weather forecast and plan for overcast light or a twilight exterior shot if possible.
- Turn on all interior lights and open blinds/curtains.
- Remove pets, pet items, and personal vehicles from visible areas.
- Level the camera and tripod for every shot to avoid converging verticals.
- Shoot a consistent room-by-room sequence so nothing important gets missed.
- Bracket exposures for any room with strong natural light contrast.
- Capture at least one exterior shot in flattering light, and consider a twilight shot for higher-value listings.
- Review images before leaving to confirm nothing is out of focus, poorly framed, or shows an unwanted reflection.
- Edit for accuracy, not exaggeration — the finished photos should look like what a buyer will actually see at the showing.
Final Thoughts
Great listing photography isn’t really about expensive gear — it’s about a disciplined process: prepare the home properly, use a wide-but-not-distorting lens, keep the camera level, shoot in flattering light, and edit to refine rather than reinvent the space. The homes that photograph best aren’t necessarily the most expensive ones; they’re the ones where someone took the time to stage thoughtfully, shoot deliberately, and edit honestly.
Given how much buyer behavior now hinges on that first online impression, treating photography as a core part of your listing strategy — not an afterthought squeezed in after the sign goes in the yard — is one of the highest-leverage decisions a seller or agent can make.
Reliable Sources
- National Association of REALTORS® — Research and Statistics
- Adobe: Real Estate Photography — Tips from Professional Photographers
- Zillow Research
- Federal Aviation Administration — Drone (UAS) Registration and Rules
- U.S. Department of Housing and Urban Development — Fair Housing Act Overview
This article is for general informational and marketing-education purposes only. Local MLS photo standards, drone regulations, and state-level disclosure rules for AI-edited or virtually staged images vary by jurisdiction — always confirm current requirements with your local MLS, a licensed real estate professional, and applicable local drone regulations before publishing listing photos.